Setting Up Exempt Schedules
Each time you have a new employee, you, as the manager, are responsible for setting up their schedule in E-Time.
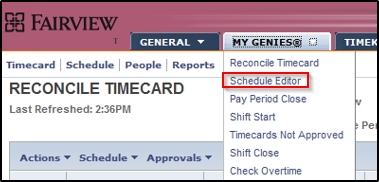
- Click the My Genies drop down and select Schedule Editor.
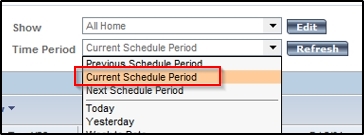
- Click the Time Period drop down and select Current Schedule Period.
- Select the employee for whom you wish to create a schedule.
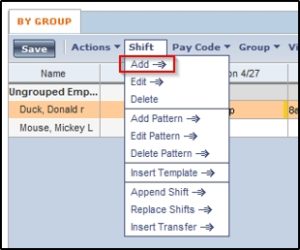
- Click the Shift drop down and select Add Pattern.
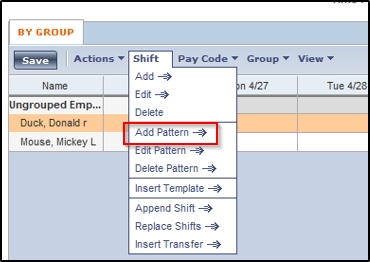
- Within the schedule editor, you can create/edit an employee’s schedule by either inserting a shift pattern or adding a pattern of shifts.
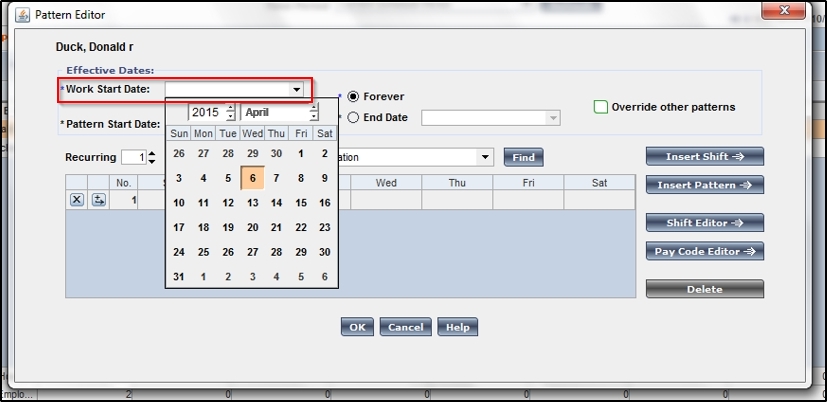
- Click the Work Start Date drop down and select the date the employee or group will start working. This date is usually the first day of a pay period.
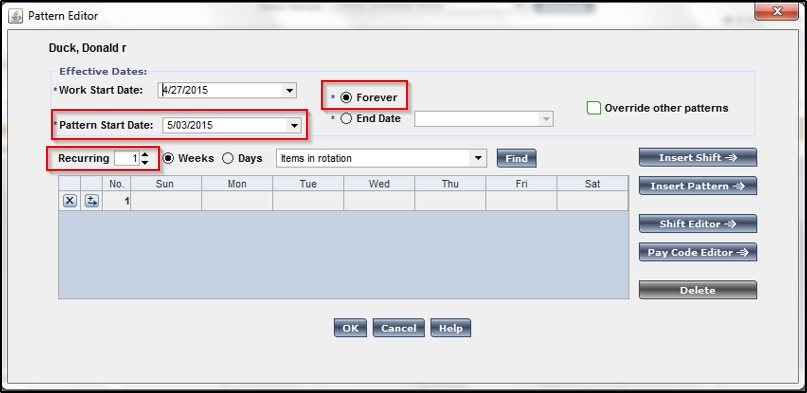
- For the pattern to repeat each week, click on the Pattern Start Date drop down and select the date you want the pattern to begin. This should be the first day of a pay period (as above).
- To repeat the pattern each week, keep the Recurring field to 1.
- If you want the pattern to continue indefinitely, keep the Forever button selected. Otherwise select a date for the End Date field.
- Select the cell for the day you want to schedule a shift.
- Type in the employee’s shift on that day (example: 8a-430p). You may also enter the shift in military time if you choose (example: 0700-1530).
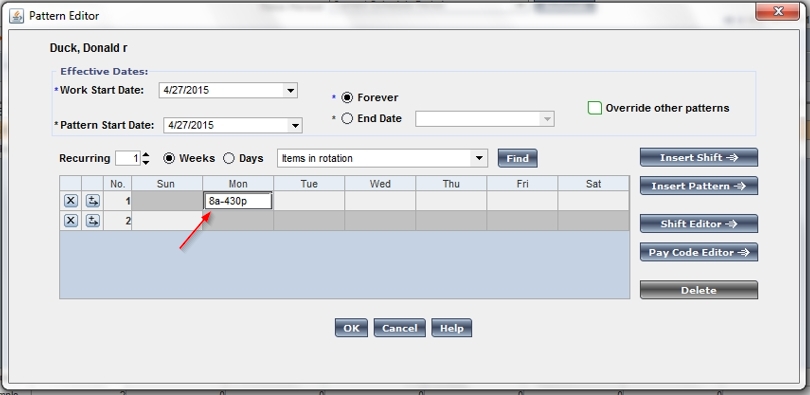
- Continue by clicking in each cell you wish to enter a schedule for until you have the entire schedule entered.
- Once you have completed entering the pattern, click OK.
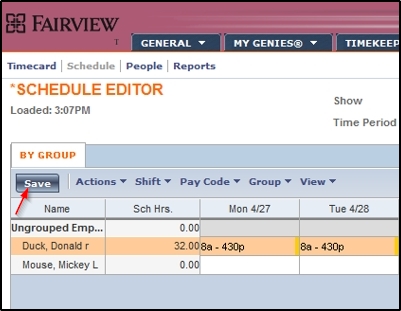
- Click Save.
- Click OK in the confirmation message. It may take a few minutes for the system to update.
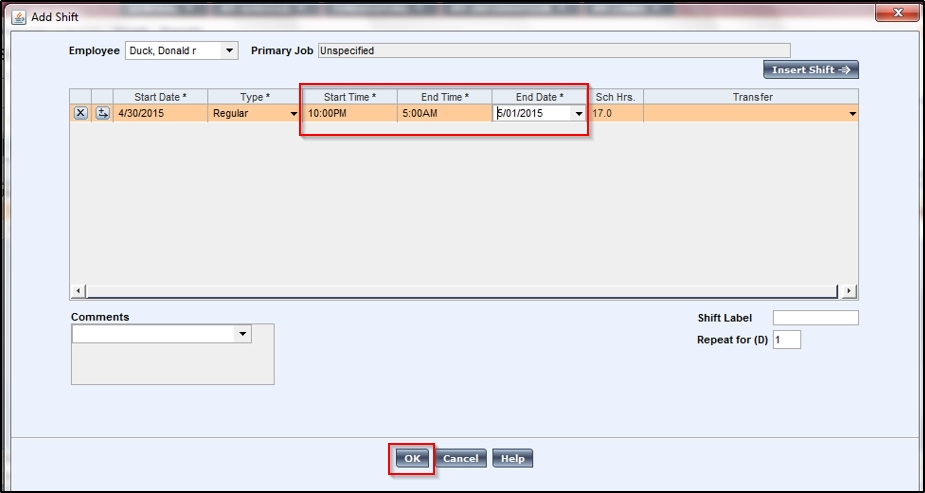
- To enter a single shift that is not within the pattern, begin by clicking on the day. .
- Select the Shift drop down and choose Add.
- Click the Start Time field and enter the start time (example: 10:00pm).
- Then click the End Time field and enter the end time (example: 5:00am).
- Once all information has been entered on this page, select OK.