Managers and Timekeepers can make historical edits, which is a change or addition to an employee’s time card after the pay period has passed.
Non-Exempt Historical Edits
- Open the time sheet for the employee whose schedule you need to edit.
- Click on the Time Period drop down and select Range of Dates.
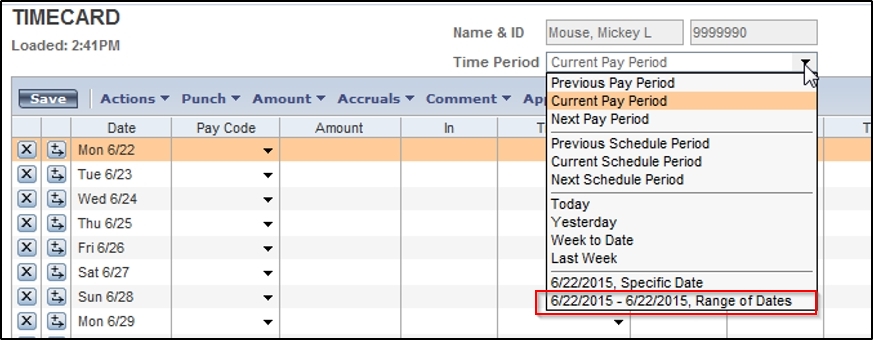
- Enter the range of dates on the window where edits or additions need to be made.
- The dates should be the first and last day of the pay period you need to edit.
- Click the drop down in the Start Date field and select the first day of the pay period in question.
- Click the drop down in the End Date field and select the last day of the pay period in question.
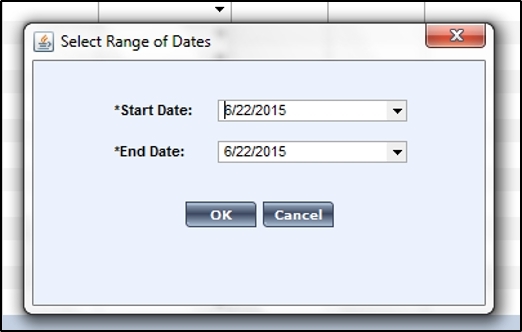
- Once your date range is selected, click OK.
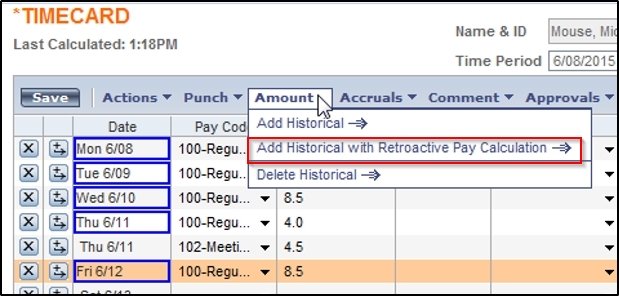
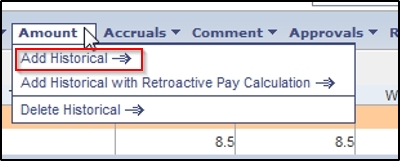
- Choose the Amounts drop down and select Add Historical with Retroactive Pay Calculation.
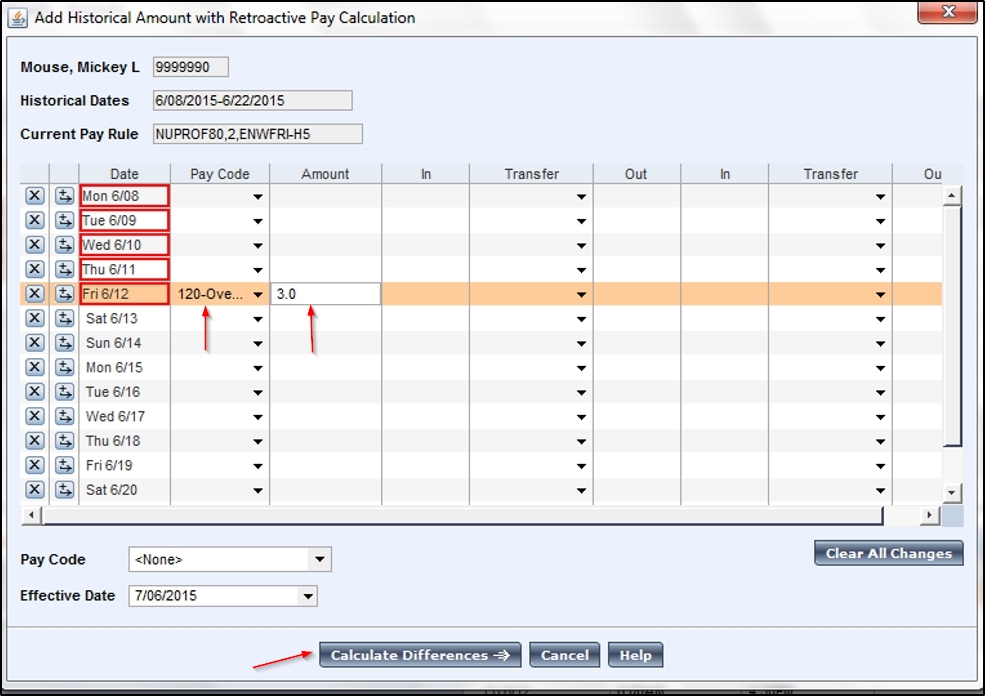
- When in the Add Historical Amount with Retroactive Pay Calculation pop-up box, you can add any necessary in/out punches as well as the pay code.
- Click the Pay Code drop down for the date in question.
- Select the appropriate pay code. In this example, we’ll chose 120.
- Enter the number of hours in the Amount drop down.
- When the information is entered, click Calculate Differences.
- If everything looks correct, click Save.
- To view historical edits, select the Historical Amounts tab in the employee’s time sheet.
Exempt Historical Edits
- Follow steps 1 – 6 above.
- When selecting the Amounts drop down after the range of dates has been entered, select Add Historical.
- Select the appropriate date from the Historical Date drop down.

- Once the date has been selected, click the Amount field and enter the amount.
- If you are removing hours, make sure to include the minus sign (-).

- Only enter information into the Transfer field if necessary (transfer to a different department, position, etc.).
- The Effective Date will automatically populate to today’s date and the Include in total for effective date will be checked. These should never be changed.
- Click OK.